If you’re visiting Japan for the first time, grocery stores can feel both exciting and overwhelming—especially if you can’t read the labels. The good news: Japanese supermarkets are usually clean, organized, and very tourist-friendly once you know a few patterns. This guide will help you shop confidently, choose food safely, save money with discount times, and avoid common “take-home” mistakes at the airport.
Quick answer: For an easy, budget-friendly meal in Japan, head to the prepared foods section (bento, salads, fried items), check the date/time label, look for discount stickers in the evening, and pay at the register (or self-checkout) with cash or card. If you have allergies, use a translation app camera on the ingredients and allergy box—and when in doubt, pick simpler foods with clear pictures and fewer ingredients.
Related guide: If language worries are your main stressor, see Can You Travel Japan Without Speaking Japanese? A Practical Guide.
What Japanese grocery stores are like (and how to find one)
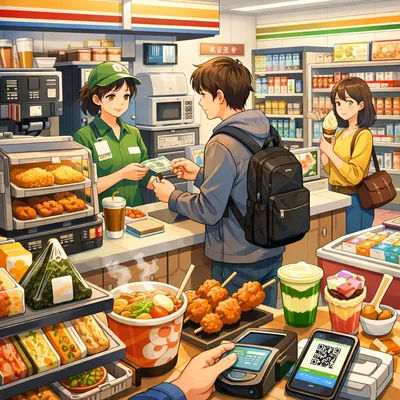
In Japan, “supermarkets” are everyday grocery stores used by locals. They’re different from convenience stores: supermarkets are usually cheaper for fresh food, fruit, ready-made dinners, and snacks to bring back to your hotel.
- Where to find them: Near residential areas, big train stations, and shopping streets. Many are in basements of department stores or inside malls.
- Typical hours: Many close in the evening (often around 9–10 pm), but it varies by chain and neighborhood.
- What they’re best for: Prepared meals, seasonal fruit, desserts, drinks, breakfast items, and souvenir-friendly snacks.
Tip: If you’ll rely on translation tools in-store, having reliable data makes shopping much easier.
Related guide: Best eSIM for Japan (2026): A First-Timer’s Practical Guide to Data, Networks, and Setup.
Supermarket layout: a simple mental map
Stores vary, but many follow a predictable flow. Use this as a “no-stress” map, not a strict rule.
| Area | What you’ll see | Tourist-friendly picks |
|---|---|---|
| Entrance / front | Produce, seasonal displays, flowers | Bananas, cut fruit cups, cherry tomatoes |
| Perimeter aisles | Fish/meat counters, dairy, tofu, prepared foods | Bento, salads, grilled fish, yogurt, tofu |
| Middle aisles | Dry goods, noodles, snacks, drinks | Instant soups, rice packs, crackers, tea |
| Back corner | Frozen foods, ice cream | Frozen dumplings, fruit bars |
| Near checkout | Small snacks, candy, sometimes bakery | Chocolate, cookies, small souvenirs |
How checkout works (and the small etiquette that reduces stress)
Most supermarkets are straightforward, but a few habits make everything smoother:
- Baskets, not big carts: Many stores use hand baskets. If you buy a lot, you may stack a second basket.
- Bagging is often self-service: After paying, you may move to a separate counter to pack your items.
- Bring a reusable bag: Bags may cost extra. If you forget, it’s easy to buy one at checkout.
- Payment options: Cash is always safe. Many stores accept cards and contactless, but not all—especially smaller local supermarkets.
Related guide: For general “what’s polite and normal” in Japan, see Japanese Etiquette for Tourists: What Foreign Visitors Should Know (Stress-Free Guide).
Discount stickers and the best time to shop
If you want to save money, supermarkets can be a goldmine—especially for ready-made meals.
- When discounts happen: Often in the late afternoon to evening as stores try to sell prepared foods before closing. Timing varies by store and day.
- What gets discounted: Bento, sushi trays, fried foods, salads, and sometimes bread or desserts.
- How to shop it: If you’re flexible, browse first, then circle back after 20–30 minutes to see what got marked down.
Stress-free strategy: Plan sightseeing earlier, then do a “supermarket dinner run” on the way back to your hotel.
Related guide: If you’re choosing a base area in Tokyo, staying near everyday shopping streets makes this much easier. Where to Stay in Tokyo for Your First Trip to Japan (Stress-Free Areas).
Food labels: what to check every time (even if you can’t read Japanese)
You don’t need to understand everything on the package. Focus on a few high-value checks that reduce risk and waste.
1) Date and time (freshness)
- Look for: A printed date/time sticker on prepared foods and refrigerated items.
- Rule of thumb: If it’s a ready-to-eat meal, prioritize items with a clear “eat by” style label and avoid anything you can’t interpret confidently.
2) Storage instructions
- Look for: Icons or short text near the barcode or ingredients area.
- Common sense approach: If it’s chilled now, keep it chilled. If you’re heading out for hours, choose shelf-stable items instead.
3) Allergy and ingredients (especially for sauces and mixed foods)
If you have allergies or dietary restrictions, be extra cautious with:
- Prepared foods (bento, salads with dressing, croquettes)
- Snacks with fillings (cream, chocolate, “assorted” packs)
- Sauces and seasonings (they can contain multiple allergens)
Important: Allergy labeling rules and formats vary by country, and translation apps can miss details. If your allergy is severe, consider sticking to simpler single-ingredient foods and brands you can verify, and check current official guidance for Japan’s labeling standards.
Using AI translation and your camera: practical, safer techniques
Translation apps can be incredibly helpful in Japanese supermarkets, but you’ll get better results with a few small adjustments.
Camera technique for clearer translations
- Get the flat panel: Aim for the ingredients panel, not the front design. Flatten crinkles with your hand.
- Use bright, even light: Avoid glare from overhead lights by tilting the package slightly.
- Fill the frame: Zoom so the text is large, sharp, and not skewed.
- Try two shots: One close-up for the ingredients, one for the allergy box/section (if present).
Smart prompts to reduce confusion
If the live camera translation is messy, take a photo and use text selection/scan. Then try searching within the translated text for:
- Your allergen keywords (for example: peanuts, milk, wheat, egg, shrimp, crab, buckwheat)
- “Contains” / “may contain” style warnings (wording varies)
If translation seems unreliable: safer fallback choices
- Choose fewer-ingredient foods: Plain yogurt, bananas, plain rice packs, simple bread.
- Use the “picture test” carefully: Pictures can help (fish, fruit, chocolate), but they don’t reveal sauces, powders, or shared-facility warnings.
- Buy small first: If you’re unsure, test with a small portion rather than stocking up.
Related guide: For a broader list of tools that help first-timers navigate Japan smoothly, see Japan Travel Apps You Should Download Before Your Trip (First-Timer List).
What to buy: easy supermarket picks for tourists
If you want a low-effort meal or hotel snack setup, these categories are usually the easiest to shop without deep label reading.
- Prepared meals: Bento, rice bowls, grilled fish sets, salads (check dressing), simple pasta.
- Breakfast basics: Yogurt, bananas, granola, small pastries, milk/soy drinks (check allergens).
- Hydration: Bottled water, tea, sports drinks.
- Hotel-friendly snacks: Crackers, cookies, chocolate, nuts (careful with allergies), dried fruit.
- Souvenir-friendly foods: Boxed sweets, regional snack packs, tea, instant soup mixes (check take-home rules below).
Short-trip shopping simulations (3 days and 1 week)
These are practical “copy-and-paste” plans designed for tourists who don’t want to spend vacation time hunting for restaurants every meal.
3-day plan: minimal effort, maximum convenience
- Day 1 (arrival): Buy a discounted prepared dinner + a drink. Add breakfast items for tomorrow (yogurt + fruit).
- Day 2: Breakfast from your hotel room. Lunch out while sightseeing. Evening supermarket run for discounted bento/sushi and a small dessert.
- Day 3: Use up what’s left for breakfast. Buy shelf-stable snacks for the train/airport (cookies, crackers, tea).
1-week plan: save money without feeling like you’re “living in a kitchen”
- Breakfast (most days): Rotate yogurt + fruit, bread/pastry + drink, or granola + milk/alternative.
- Lunch: Mix of restaurant meals and supermarket options (salad + protein, rice bowl, on-the-go snacks).
- Dinner: Aim for 2–4 supermarket dinners (especially on busy sightseeing days), timed for evening discounts.
- Smart restock rhythm: Buy fresh items every 2–3 days; keep shelf-stable snacks on hand so you’re never “stuck.”
One evening “discount-time” savings routine (simple and realistic)
- Arrive with a flexible meal idea (for example: “any bento + salad”).
- Check the prepared foods section first.
- If discounts aren’t out yet, grab drinks/snacks and loop back once.
- Pick the freshest-looking discounted item with the clearest date/time label.
- Buy only what you can eat that night (hotel fridges vary).
Absolute rules for taking food home (quarantine and import restrictions)
This is where many tourists get surprised: what you can buy in Japan is not always what you can bring into your home country. Rules vary widely, and they change. Always check your destination country’s official customs/quarantine website before you pack food in your luggage.
Common high-risk items (often restricted or requires declaration)
- Meat products: Jerky, sausages, meat buns, meat-based ramen toppings, and some instant foods with real meat ingredients.
- Fresh fruit and vegetables: Whole apples, citrus, grapes, etc. Fresh produce is frequently restricted.
- Dairy: Some countries restrict certain cheeses, milk products, or items containing them.
Processed foods that are often easier—but still need checking
- Packaged sweets and cookies (factory-sealed)
- Tea (sealed)
- Instant soups/noodles (but watch for meat ingredients)
- Seasonings (check liquid limits if carrying on; check import rules if unsure)
Practical “no drama” take-home checklist
- Keep items factory-sealed when possible.
- Photograph the ingredient panel before you travel to the airport (helps if customs asks).
- When in doubt, don’t pack it—or be ready to declare it.
- Check current rules for both your home country and any transit country you enter.
Common mistakes tourists make (and easy fixes)
- Mistake: Buying lots of chilled food, then sightseeing for hours.
Fix: Buy chilled items right before heading back, or choose shelf-stable snacks earlier in the day. - Mistake: Assuming a snack is “safe” because the picture looks simple.
Fix: For allergies, translate the ingredients/allergy section or choose single-ingredient foods. - Mistake: Missing the best discounts by shopping too early.
Fix: Try an evening visit and look at the prepared foods section first. - Mistake: Packing airport souvenirs without checking import rules.
Fix: Stick to sealed sweets/tea, and check official customs guidance before your trip home.
FAQ: Japanese grocery stores for first-time visitors
Are Japanese supermarkets cheaper than convenience stores?
Often yes—especially for fruit, drinks, snacks in larger packs, and prepared dinners. Convenience stores are great for speed; supermarkets are great for value.
Can I pay by credit card?
Many supermarkets accept cards and contactless payments, but not all. Carry some cash as a backup, especially outside big cities or in smaller local stores.
Do supermarkets have self-checkout?
Some do. If you’re unsure, watch what locals do or choose a staffed register. Self-checkout screens may offer an English option, but it varies.
Is it okay to eat supermarket food in my hotel room?
Usually yes, and many travelers do. Just be mindful of strong smells and dispose of packaging neatly.
Are grocery stores tax-free for tourists?
Typically, everyday grocery purchases aren’t the main place tourists use tax-free shopping, and rules can be specific. If you’re shopping for souvenirs or higher-priced items, it’s worth understanding how tax-free works and what mistakes to avoid.
Related guide: Japan Tax-Free Shopping Mistakes First-Time Visitors Make (And How to Avoid Them).
Quick supermarket checklist (save this before you go)
- Reusable bag (or small budget for store bags)
- Phone with data + translation app ready
- Plan chilled purchases for the end of the day
- Check date/time label on prepared foods
- For allergies: translate ingredients and any allergy section
- Look for evening discounts on prepared foods
- Before packing souvenirs: check your home country’s import rules
If you keep it simple—prepared foods for dinner, fruit/yogurt for breakfast, and a few shelf-stable snacks—you can eat well in Japan without spending much time or mental energy. And once you’ve done one supermarket run successfully, the next one will feel easy.
Related guide: For more first-timer planning tips that reduce stress across your whole trip, see First Time in Japan? 15 Things to Know Before You Go (Stress-Free Tips).