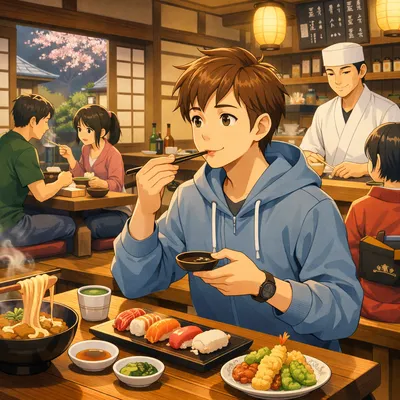
You walk into a tiny ramen shop. It’s busy. It’s warm. Everyone looks like they already knows what to do. And there it is: a big button-covered machine near the entrance, quietly judging you.
Don’t worry. You’re not the only one. This is where many first-time visitors get stuck. Not because it’s “hard,” but because the flow is different from what you’re used to.
Here’s the thing: once you understand the pattern, restaurant ticket machines in Japan become weirdly comforting. You pay first, you hand over a ticket, and then you just… sit down and wait for food. No awkward “Can I get the check?” moment. Honestly, it’s kind of brilliant.
Quick note: Ticket machines vary by restaurant. Some are modern touch screens with English. Some are older, cash-only, and very confident about it. Use this guide as a calm starting point, and adapt to what you see in front of you.
Quick Answer: The Calm 30-Second Version

In many ticket-machine restaurants, you choose your meal and pay first at the machine near the entrance.
You then take the printed ticket (and your change) and hand the ticket to staff or place it where they can see it.
After that, you sit down and wait. If the restaurant offers customizations (like noodle firmness), staff often asks you after you sit.
Who This Guide Is For
This guide is for you if:
- You’re a first-time visitor to Japan and you don’t want your first ramen to start with panic.
- You don’t speak Japanese and you’re worried about holding up a line.
- You’re traveling with kids, a partner, or friends and you want a smooth “everyone gets fed” moment.
- You’re tired, jet-lagged, or your phone battery is low (the classic combo).
- You want a simple system that avoids ordering stress.
What a Restaurant Ticket Machine Is (and Why Japan Loves Them)
A restaurant ticket machine is basically a self-order kiosk that prints a meal ticket after you pay. You might hear it called shokken (a food ticket system).
It’s common at ramen shops, quick rice bowl restaurants, and set-meal places. The main reason is simple: it speeds things up. Staff can focus on cooking and serving instead of handling payments at the counter.
Sounds dramatic? Maybe. But when a shop is packed and everyone is hungry, this system keeps the line moving.
Stress-Free Tip: If you see a ticket machine near the entrance, assume you’ll order and pay first. That one assumption saves you a lot of confusion.
Before You Touch Anything: Watch the “Local Flow” for 10 Seconds
Let’s be honest. The most confusing part is not the buttons. It’s the question: Do I line up first, or buy a ticket first?
Both patterns exist, and it depends on the restaurant. In many cases, you can solve it by doing one simple thing: watch what the person in front of you does.
Common patterns you’ll see
- Pattern A: People queue first, then step to the machine when it’s their turn.
- Pattern B: People buy tickets immediately, then join the line holding tickets.
- Pattern C: People check for seats first (in small shops), then buy tickets.
Tiny warning: If the entrance area is tight, don’t block the doorway while you decide. Step to the side, breathe, then approach the machine when you’re ready.
Stress-Free Tip: If you’re unsure, quietly stand to the side and watch two customers. That’s usually enough to copy the correct flow.
Step-by-Step: How to Use Restaurant Ticket Machines in Japan
Most machines follow the same basic logic, even if the design looks different. Here’s the simple version.
Step 1: Look for an English button (first!)
Many newer touch-screen machines let you switch languages. Often, the English option is near the top-right of the screen, though it can vary.
If you see it, press it immediately. It’s like turning on the lights in a dark room.
Stress-Free Tip: If you’re traveling with someone, have one person look for the English button while the other checks the menu photos or display above the machine.
Step 2: Decide what you’re getting (without overthinking it)
Some machines have big photos. Great. Choose with your eyes and move on with your life.
Older machines may be mostly text. In that case, look for a menu board or photo display nearby. Many shops show pictures above the machine or on the wall to help you match items.
The “left-top button” shortcut
Many travel guides mention a surprisingly useful pattern: the top-left button is often the most popular or signature item.
Is it a law of physics? No. But when you’re hungry and the line is behind you, it’s a very comforting rule of thumb.
Stress-Free Tip: If you can’t read anything and there’s no English, the top-left option is often a safe bet for a “standard” bowl or set.
Step 3: Insert money (many machines want this before you press a button)
On many machines, you put money in first. Then the items you can afford light up or become selectable.
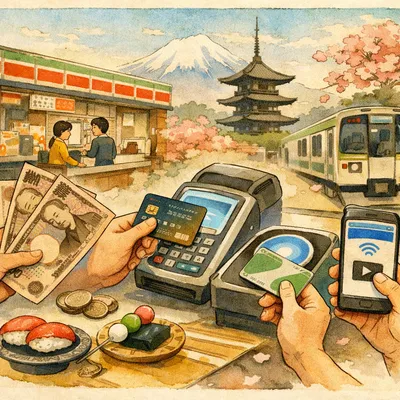
Some places now accept cashless payments like IC cards (such as Suica or Pasmo) or QR-style payments. But plenty of restaurants still use cash-only machines, especially older ones.
Carry a few 1,000-yen bills if you can. Many travelers find it makes ticket machines much easier.
Tiny warning: Some smaller shops may not accept large bills in the machine. If you only have a big bill, you might need to break it elsewhere first (a convenience store is a common option).
Stress-Free Tip: Before dinner, check your wallet. If you have no small cash, fix that earlier in the day. Doing it while hungry is when mistakes happen.
Step 4: Press the button to order (watch for lights and blinking)
Once money is inserted, available items often light up or blink. Press your choice, and the machine will confirm and print.
Layouts vary, but a common pattern (especially at ramen shops) looks like this:
- Top row: main dishes (different soup types or core sets)
- Different columns: variations (extra meat, egg included, spicy version)
- Bottom rows: toppings, side dishes, drinks
Stress-Free Tip: If you want to keep it simple, buy one main item first. You can often add extras later, but you can’t undo a chaotic first order easily.
Step 5: Take your ticket (and your change!)
Your ticket usually prints into a tray near the bottom. Change may come out automatically, or the machine may require an extra step (like pressing a change button) depending on the model.
Either way, make it a habit to do a final “tray check.”
Stress-Free Tip: Before you step away, look for two things: the ticket and any coins/bills. Hungry brains forget coins. It happens.
Step 6: Give the ticket to staff (or place it where they can see it)
After you get your ticket, what happens next depends on the restaurant.
- Sometimes you hand it to staff immediately near the machine.
- Sometimes you sit down and place it on the counter, or staff comes to collect it.
If there are custom options (like noodle firmness or soup richness), staff often asks you after you sit. So don’t panic if the machine didn’t ask.
Stress-Free Tip: If you’re unsure, hold the ticket visibly and make eye contact with staff. They’ll usually gesture what to do next.
If You Can’t Read the Menu: Your “No Panic” Toolkit
This is the moment that makes people freeze. You’re staring at a wall of text buttons. The line is behind you. Your brain is doing the “why didn’t I study harder?” thing.
Good news: you have options.
Option 1: Find English (even if it’s hiding)
Check the corners of the screen for language settings. On touch screens, English is often available. On older button machines, it may not be.
Stress-Free Tip: Scan the machine like a clock: top-right, top-left, bottom-right, bottom-left. You’ll find language settings faster than randomly tapping.
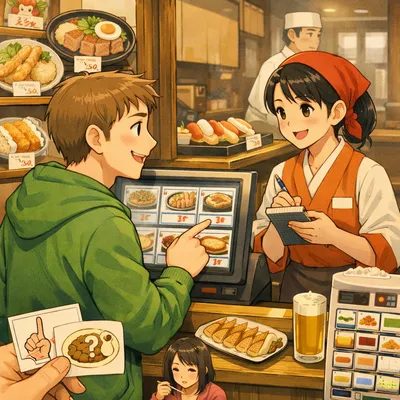
Option 2: Use photos like a normal human
If there are photos on the machine, on the wall, or on a display above it, use them. You don’t need to be perfect. You just need to be fed.
Stress-Free Tip: If you’re traveling with kids, photos are your best friend. Let them pick a picture. Everyone wins.
Option 3: Use your phone camera translation (quickly)
Many travelers use a camera-translation app to read signs and menu text. It’s not always elegant, but it’s often “good enough” to identify the basics.
Tiny warning: Don’t do a long translation session while standing in the main flow of traffic. Step aside, translate, then return to the machine.
Stress-Free Tip: Low battery? Take one quick photo of the machine/menu board, then step away and translate from the photo.
Option 4: Ask for a recommendation (yes, it’s allowed)
If staff are available and the moment feels okay, you can ask for a recommendation. Even if their English is limited, “recommendation” is a concept that travels well.
You may also see travelers use the phrase “Osusume wa nan desu ka?” which means “What do you recommend?” (Romanized for your convenience.)
Stress-Free Tip: If you ask, point to the machine and smile. Keep it short. You’re not ordering a 12-course tasting menu. You just want the popular bowl.
What You’re Actually Buying: Common Buttons and Choices (Especially for Ramen)
Ticket machines can feel random until you realize they’re usually organized by “main item first, extras later.”
Main dish buttons (the big ones)
In ramen shops, the main buttons are often different soup styles or house specialties. You don’t need to memorize them. But you can expect the machine to offer a few core choices and then variations.
Size options
You may see size choices like omori (large) and namimori (regular). Not every restaurant uses the same words, but the idea is common: regular vs bigger.
Stress-Free Tip: If you’re not sure, choose regular. You can always add a side dish. A huge bowl when you’re jet-lagged can be… ambitious.
Typical add-ons
Add-ons are often on lower rows: extra egg, extra meat, extra noodles, dumplings, rice, or drinks.
One common topping you might see mentioned is ajitama, a seasoned egg. If you like eggs, it’s usually a safe and tasty upgrade.
Stress-Free Tip: If you want to try one add-on without risk, an egg topping is often the least “surprise” option.
How to Handle Lines, Crowds, and That “Everyone Is Waiting” Feeling
I know, it sounds confusing, but the stress is usually social, not technical. You feel like you’re slowing everyone down.
Here’s the truth: many Japanese customers also pause at the machine. They just do it quickly because they’ve practiced.
When the shop is crowded
- Step aside before deciding.
- Have your cash ready before you approach.
- Pick a “safe” main item fast (remember the top-left shortcut).
When you have luggage (please don’t)
Ticket-machine restaurants are often small. If you walk in with a large suitcase, it can get cramped fast.
If you can, avoid these places right after arriving with big luggage. Or choose a larger, more spacious restaurant for that first meal.
Stress-Free Tip: If you must go in with luggage, keep it tight to your side and out of the entrance path. Your goal is “small footprint.”
Common Mistakes (Totally Understandable)
No shame here. These mistakes are extremely normal for first-time visitors.
- Standing in front of the machine while deciding for a long time. Step aside first, then commit.
- Forgetting to take change. Always do the final tray check.
- Assuming the machine accepts cards. Some do, many still don’t. Carry cash.
- Buying the wrong number of tickets. One person = one main ticket, generally. If you’re a group, buy separately unless the machine clearly supports multiples.
- Panicking when customization isn’t on the screen. Staff may ask after you sit, especially at ramen shops.
Stress-Free Tip: If you make a mistake, keep the ticket and ask staff for help. Showing the ticket is often easier than explaining with words.
Recommended Options (Only If They Make This Easier)
You don’t need fancy gear to use a ticket machine. But a few small choices can reduce stress a lot.
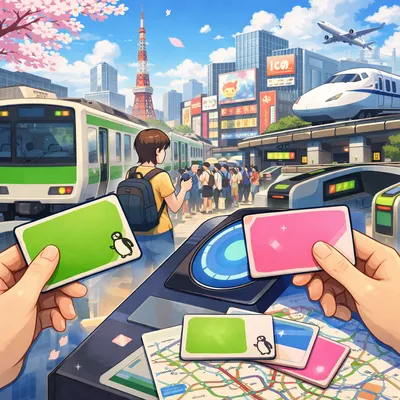
IC card (Suica/Pasmo or other transport IC card)
Best for: Travelers who want fast payments for trains, convenience stores, and (in some cases) newer ticket machines.
Not ideal for: People who want to rely on it everywhere. Many restaurants still use cash-only machines.
My honest take: An IC card is great for daily life in Japan, but don’t treat it as your only payment method. Keep cash as your backup.
A small coin pouch (or any “easy access” pocket)
Best for: Anyone who hates digging for coins while a line forms behind them.
Not ideal for: Minimalists who truly carry nothing extra (you can still survive with a normal wallet).
My honest take: This is a tiny thing that makes you feel weirdly organized. And yes, it helps at ticket machines.
A translation app with offline basics downloaded
Best for: Travelers going beyond major tourist areas, or anyone nervous about menus without English.
Not ideal for: People who don’t want to use their phone during meals (fair).
My honest take: Even if you don’t use it often, having it ready reduces anxiety. Just don’t let it turn ordering into a 10-minute research project.
Stress-Free Checklist: Ticket Machine Restaurants
- Carry a few 1,000-yen bills and some coins before you go out to eat
- When you enter, watch the flow for 10 seconds (line first or ticket first?)
- Look for an English button at the top corners of the screen
- If you can’t read the menu, use photos or the “top-left is popular” shortcut
- Insert money first if the machine seems to require it
- Take your ticket and do a final check for change
- Hand the ticket to staff (or place it where they can see it)
- Expect customization questions after you sit, especially at ramen shops
What to Prepare Next
You don’t need to plan everything at once. Start with the parts that reduce the most stress first.
- Decide your “Japan payments” plan: cash + card + (optional) IC card
- Set up a translation app and practice camera translation once before your trip
- Save a few “help me” phrases in your notes app (including “recommendation?”)
- Plan your first meal for an easy time of day (not peak dinner rush if you’re nervous)
FAQ
Do I always have to buy a ticket before sitting down?
Often, yes. But it varies. If you’re not sure, watch what other customers do or look for staff gestures near the entrance.
Are restaurant ticket machines in Japan cash-only?
Many still are, especially older machines. Some newer machines accept IC cards or other cashless options, but it’s safest to carry small cash.
What if I press the wrong button?
Keep the ticket and ask staff for help. Showing the ticket is usually enough for them to understand what happened, even with limited shared language.
Why didn’t the machine ask for noodle firmness or soup richness?
In many ramen shops, the machine handles the main order and payment, and staff asks about preferences after you sit down.
Is it rude to use my phone to translate the menu?
Generally, no. Just step aside so you don’t block the entrance or the machine while you translate.
Final Thoughts
Ticket machines can feel intimidating for about five minutes. Then they become one of those “Oh, Japan is efficient” moments.
If you remember one thing, remember this: watch the flow, pay first, take your ticket, and hand it to staff. That’s the whole system.
You don’t need to be perfect. You just need to be prepared. And once you’ve done it once, you’ll walk into the next ramen shop like you belong there. (Even if you’re still quietly proud of yourself. As you should be!)