You’ve landed in Japan. Your brain is foggy from the flight. Your phone battery is low. And suddenly there are signs everywhere, people moving fast, and you’re thinking, “Okay… what do I do first?”
Don’t worry. You’re not the only one. This is where many first-time visitors get stuck—right after landing, before you’ve even seen a vending machine.
This guide walks you from the plane to your city hotel in a calm, simple order. You’ll know what the signs mean, how the digital entry process works in 2026, what to set up in the arrivals lobby, and how to leave the airport without dragging your suitcase into chaos.
Quick Answer

After landing, follow signs for Arrivals and Immigration, complete any required health checks, pass immigration, pick up your bags, then finish Customs.
In many airports, Visit Japan Web and newer common kiosks can make this faster—just keep your passport and QR code ready.
Once you’re in the arrivals lobby, set up internet, get cash if needed, and sort your transport (train/bus/taxi) before heading to your hotel.
Related guide: Want a calm pre-trip prep list too? First Time in Japan? 15 Things to Know Before You Go (Stress-Free Tips).
Who This Guide Is For
This is for you if:
- You’re visiting Japan for the first time and want a simple, step-by-step flow.
- You don’t speak English and worry you’ll miss something important.
- You feel anxious about airports, lines, and “Am I doing this right?” moments.
- You’re arriving with family, big luggage, or after a long-haul flight.
- You want to use Visit Japan Web (but you’re not sure how it fits into the real airport process).
If you’re coming to Japan for study, work, or a longer stay, don’t worry—there’s a dedicated section below for what to do after you leave the airport (within your first 14 days).
The Big Picture: The Only Order You Need to Remember
Here’s the thing. Most Japanese airports follow the same basic flow, and the signs are usually clear once you know what you’re looking for.
Arrivals → Immigration → Baggage Claim → Customs → Arrivals Lobby
If you remember one thing, remember this: don’t hunt for ATMs, SIM cards, or trains before you finish immigration and customs. You can’t access the public arrivals lobby until you’re done with those steps.
Stress-Free Tip: Take a screenshot of that order (or write it in your notes). When you’re tired, simple wins.
Step 1: After You Exit the Plane (Follow “Arrivals”)
As soon as you step into the airport, look for signs that say Arrivals and Immigration. You’ll usually be guided through a corridor or escalators toward passport control.
Many first-time visitors worry about English-only signage. But airports are designed for international travelers. In most cases, the key signs are in English too.
What you might see on signs:
- Arrivals (you want this)
- Immigration or Passport Control (also you)
- Transfer (only if you’re connecting to another flight)
Stress-Free Tip: If you’re unsure, follow the crowd that looks like they just got off an international flight. It’s not foolproof, but it’s surprisingly effective.
Step 2: Health / Quarantine Checks (Only If Required)
Depending on the current health situation, you may be asked to complete a health questionnaire or show something related to health screening. Sometimes forms are handed out on the plane, and sometimes it’s handled digitally.
Because this can change, it’s smart to check the latest official airport/government guidance before you fly.
Stress-Free Tip: Keep a pen in your carry-on. Sounds dramatic? Maybe. But it helps when a form appears out of nowhere.
Step 3: Immigration (Passport Control) Without Panic
This is the line where your brain tends to go, “Wait… am I in the right place?” Totally normal.
Immigration lanes are usually separated by traveler type. You may see lanes like:
- Temporary Visitors (most tourists)
- Residents / Re-entry (people living in Japan)
- Japanese Nationals
If you’re visiting as a tourist, you’ll generally want Temporary Visitor. If you’re not sure, staff are often nearby. You can simply show your passport and ask, “This line okay?”
What to Have Ready
At the front of the line, you’ll usually need:
- Your passport
- Your arrival details (flight info and where you’re staying)
- Your Visit Japan Web QR code if you’re using it
Immigration procedures can vary by airport and by the systems in use that day, so follow the signs and staff instructions.
Stress-Free Tip: Put your passport in the same pocket of your bag every time. Consistency beats chaos when you’re jet-lagged.
Step 4: Baggage Claim (Yes, It’s Usually Straightforward)
After immigration, you’ll enter Baggage Claim. Look for:
- Electronic screens showing flight numbers
- Carousel numbers (like “Belt 6”)
Find your flight number on the screen. Then stand near that belt and wait for your luggage.
If Your Bag Doesn’t Show Up
Annoying, but it happens. Before you leave baggage claim, go to the airline’s Baggage Service counter (usually in the same area). They’ll ask for your baggage tag sticker from your boarding pass or passport wallet.
Stress-Free Tip: Keep your baggage tag sticker until you’re at your hotel. Don’t throw it away “because you’re done.” This is a classic first-timer mistake.
Step 5: Customs (Where Visit Japan Web Helps a Lot)
Once you have your bags, follow signs for Customs. This is where you declare what you’re bringing into Japan.
In recent years, Japan has been moving toward digital customs declarations. Many travelers now use Visit Japan Web instead of the old paper form, and some airports use electronic declaration terminals and gates.
Tiny warning: Processes can differ by airport and can be updated. If anything looks different on arrival day, trust the signs and staff first, and check the latest official info before your trip.
What Is Visit Japan Web (And Do You Need It)?
Visit Japan Web is an official online service where you can pre-register information for immigration and customs. It generates a QR code that can be scanned during the arrival process.
It’s often recommended to complete it before you arrive (some guidance suggests finishing several hours in advance). But if you forgot, you can usually do it after landing too—just expect it to take longer and require internet access.
Important: Visit Japan Web Is Not an App
This surprises people. Visit Japan Web is used through your phone’s browser, not a dedicated app.
Also, your QR code display may require connectivity. So if you land with no data plan and no Wi‑Fi, you may have an awkward moment.
Stress-Free Tip: If the system allows it on your device, save your Visit Japan Web QR code as a screenshot. And bring a charger or power bank.
Visit Japan Web (2026): The Simple “Do This, Then Scan That” Walkthrough
If you want the calmest arrival, think of Visit Japan Web as a time-saver, not a test. You’re just pre-filling the same information you’d otherwise do at the airport.
Part A: Pre-register and get your QR codes (before you fly)
Exact screens can change, but the flow is usually like this:
- Open Visit Japan Web in your browser and create/sign in to your account.
- Add your trip (arrival date, flight, and basic info).
- Enter your accommodation (your first hotel name and address are usually enough).
- Complete immigration and customs sections as prompted.
- Generate the QR code(s) and keep them easy to access (bookmark the page and/or screenshot if possible).
Stress-Free Tip: Save your hotel details in your phone notes (name, address, phone). You’ll use the same info for forms, check-in, and taxis.
Part B: How the airport scan usually works (kiosks, gates, and “one-stop” flow)
At some airports, you’ll see signs for common kiosks or a faster digital lane. When it’s available, the “rhythm” is typically:
- Scan your passport at the kiosk (many countries use electronic passports; follow the on-screen instructions).
- Scan your Visit Japan Web QR code (from your phone screen).
- Take a photo and follow the prompts.
- Continue to the next checkpoint (immigration booth/gate and then customs), following signs and staff direction.
Some airports feel almost “one-stop,” while others still have separate lines even if you used the kiosk. Either way, using Visit Japan Web usually reduces the amount of typing and paper handling.
Stress-Free Tip: If the kiosk area looks confusing, pause for 10 seconds and watch one traveler complete it. Then copy what they did.
If you forgot Visit Japan Web (and you’re already in the airport)
- Don’t panic. You can usually do the standard process or complete Visit Japan Web after landing.
- Connect first (airport Wi‑Fi if available, or your eSIM/SIM).
- Expect it to take longer because you’ll be doing setup while tired and possibly in a line.
Customs Declarations: What People Get Stuck On
Customs is usually quick unless something triggers a question. Common “wait, do I need to declare this?” items include:
- Large amounts of cash (rules can change; check the latest official threshold and declaration requirements)
- Restricted items (some foods, certain medications, etc.)
- High-value purchases or items above duty-free allowances
If you’re unsure, declaring is often the safer choice than trying to “hope it’s fine.” Customs staff are used to tourists and will guide you.
Stress-Free Tip: Keep receipts for expensive items in one envelope. Not because you’ll definitely need them, but because it keeps your brain calm.
Step 6: You Made It to the Arrivals Lobby! Do These 4 Things First
Once you exit customs, you’ll enter the public Arrivals Lobby. This is where the fun begins… and also where decision fatigue hits hard.
Let’s keep it simple. For most first-time visitors, these are the best first moves.
1) Get Internet (SIM, eSIM, or Pocket Wi‑Fi)
Internet is your safety net. Maps, translation, train routes, hotel messages—everything becomes easier once you’re connected.
You typically have three options:
- eSIM (fast setup if your phone supports it)
- Physical SIM (works on more phones, but you may need to swap cards)
- Pocket Wi‑Fi (good for groups, one device to share)
If you already set up an eSIM before landing, congratulations. You just skipped one of the most stressful airport errands.
Stress-Free Tip: Before your trip, check if your phone is unlocked and supports eSIM (if you’re considering it). This is the part people forget.
Related guide: Picking internet is easier with a quick comparison: Pocket Wi-Fi vs eSIM in Japan: Which One Should You Choose?.
Related guide: If you want the simplest option for landing-day connectivity: Best eSIM for Japan: What First-Time Visitors Should Know (2026).
2) Get Cash (But Don’t Overdo It)
Japan is very card-friendly in many cities now, but you’ll still run into cash-only moments. Think small restaurants, local buses, temple donations, or a random ticket machine that just refuses your foreign card.
Many travelers exchange a small amount at the airport or use an ATM. Rates and fees vary, so it’s wise to compare and choose what feels reasonable.
Stress-Free Tip: Aim for “enough for the first day” rather than “cash for the whole trip.” Less cash to worry about is also a win.
Related guide: Want a realistic sense of daily spending (and where cash still pops up)? Japan Travel Budget: How Much Money Do You Really Need?.
3) Get an IC Card (If It Makes Sense for Your Trip)
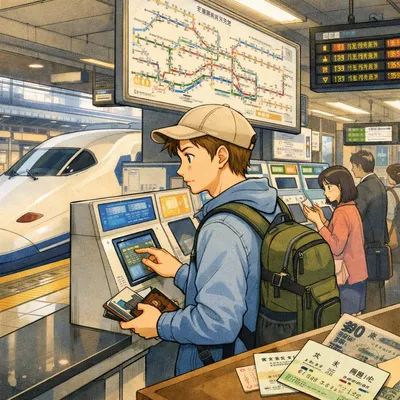
An IC card (like Suica or Pasmo) is a tap-to-pay transit card used for trains and subways in many areas. In some places you can also use it at vending machines and convenience stores.
Availability and purchase rules can change, and different regions have different IC cards. So treat this as a “nice to have,” not a requirement.
Stress-Free Tip: If the IC card line is long, skip it and just buy a normal ticket for your first ride. You can sort the IC card later when you’re less tired.
Related guide: If you want the simple version (buy, top up, tap, done): How to Use IC Cards in Japan: Suica, PASMO, and Other Travel Cards Explained (Stress-Free Guide).
4) Find Your Transport Desk or Ticket Machine Before You Buy Anything Random
This is a gentle reminder, because many first-time visitors do this: they buy a bunch of things in the arrivals lobby… then realize they’re standing on the wrong side of the airport for their train line.
Before you commit, look for signs like:
- Railway / Trains
- Airport Limousine Bus (or just “Bus”)
- Taxi
- Information
Stress-Free Tip: If you’re unsure, go to the Information counter first. Asking one question can save you 30 minutes of wandering.
Step 7: Getting From the Airport to Your Hotel (Choose Your “Stress Level”)
Now you’re thinking: train, bus, or taxi? There’s no perfect answer. There’s only the best match for your energy level, luggage, and budget.
Option A: Train (Fast, Frequent, Can Be Busy)
Trains are often the fastest way into major cities. They’re also very reliable. The trade-off is crowds, stairs, and the occasional “Which platform is this?” moment.
Many first-time visitors feel nervous about train stations in Japan. That’s understandable. Big stations can feel like a small city.
Stress-Free Tip: If you have large luggage, try to avoid peak commute times if you can. Less crowd = more breathing room.
Option B: Airport Bus (Easy With Luggage, Often Less Mentally Demanding)
Airport buses can be a great choice when you’re tired. You sit down. Your suitcase goes under the bus. You don’t have to navigate transfers.
The trade-off is that buses depend on traffic and schedules. Also, not every hotel is served directly.
Stress-Free Tip: If your hotel is near a major station, choose a bus that stops at that station. Then take a short taxi or local train for the final hop.
Option C: Taxi (Simple, Expensive, Sometimes Worth It)
If you’re arriving late, traveling with kids, or carrying heavy luggage, a taxi can feel like a life-saving shortcut. But it can be pricey for long distances.
Stress-Free Tip: Have your hotel address saved in English (and ideally copied from the hotel’s official page). It reduces confusion.
A Note About Hotel Location (Yes, It Matters on Arrival Day)
Let’s be honest. A “cute” hotel is less cute when you’re dragging a suitcase for 15 minutes from the station.
For your first trip, many travelers find it easier to choose a hotel that is:
- Near a major station
- Within a short, simple walk (or one taxi stop) from that station
- Easy to reach from the airport without too many transfers
Stress-Free Tip: When booking, check the route from the airport to the hotel in a map app. Count transfers. Fewer transfers usually means less stress.
Related guide: Choosing a base that’s easy on arrival day makes everything smoother: Japan Hotel Guide for First-Time Visitors: What to Know Before Booking.
Related guide: If Tokyo is your first stop: Where to Stay in Tokyo for Your First Trip to Japan (Stress-Free Areas).
Long-Term Stays (Study/Work): What to Do in Your First 14 Days
If you’re entering Japan for a longer stay (for example, study or work), your airport steps are similar—but your “after the airport” checklist is different.
Important: Requirements and deadlines can vary by status and location, and rules can change. Use this as a calm overview, then confirm details with your school, employer, housing provider, and local government guidance.
1) Confirm your residence card process (if applicable)
Depending on your entry status and airport, you may receive a residence card at the airport or later through local procedures. Follow the instructions given during entry, and keep the card safe—this becomes your main form of ID in Japan.
2) Register your address at your local office (usually required after you settle)
Once you have a fixed address, you’ll typically need to register it with your local office within a set period. Many new arrivals do this after moving into longer-term housing (not while staying in a hotel).
Stress-Free Tip: Bring your passport, residence card (if you have one), and any housing documents you were given. If you’re unsure what to bring, ask your school/employer for a checklist.
3) Health insurance and pension (if required for your situation)
Some long-term residents may need to enroll in local health insurance and pension systems depending on their status and employment situation. If you’re employed full-time, your employer may handle some steps. If you’re a student, your school often provides guidance.
4) Banking and phone plan: don’t do it on day one if you’re exhausted
Many people want to open a bank account and set up a longer-term phone plan immediately. Realistically, it’s often easier after you have your address registration sorted and you’re not jet-lagged.
Stress-Free Tip: For your first week, a short-term connectivity option (eSIM/SIM/pocket Wi‑Fi) can buy you time while you get settled.
If Something Goes Wrong: Where to Get Help (Without Needing Japanese)
Good news: you don’t have to solve everything alone.
Common places to get help at the airport:
- Tourist information counters
- Railway information desks
- Airport staff near ticket machines and gates
Useful phrases (simple English works):
- “Which line goes to [area]?”
- “Is this the right platform for [destination]?”
- “Which bus goes to [hotel/area]?”
Stress-Free Tip: Show your destination on your phone screen. Pointing is a universal language, honestly.
Common Mistakes (Totally Understandable, But Avoid These If You Can)
- Trying to do everything at once in the arrivals lobby. Pick internet + transport first. Shopping can wait.
- Not having a way to access Visit Japan Web after landing. No data + no Wi‑Fi = stress. Plan one connection method.
- Joining the wrong immigration line. Check the sign for “Temporary Visitors.” If unsure, ask staff.
- Throwing away baggage tags too early. Keep them until you’re at your hotel with your suitcase.
- Choosing the “fastest” route that has three transfers. The simplest route is often the best on day one.
- Dragging big luggage through a crowded station at rush hour. If you can adjust timing, your future self will thank you.
- Assuming every airport has the same kiosk setup. Some days you’ll see kiosks and fast lanes; other days it’s the standard line. Follow signs and staff.
Stress-Free Tip: Your arrival day is not a sightseeing day. Treat it like a “setup day,” and you’ll feel much better.
Recommended Options (Only If You Want the Easy Button)
eSIM (Set Up Before You Fly)
Best for:
Travelers who want internet the moment they land, and whose phones support eSIM.
Not ideal for:
Phones that are carrier-locked, or travelers who hate fiddly setup steps.
My honest take:
If you’re nervous about airports, eSIM can remove a big chunk of arrival stress. Just double-check compatibility and follow the provider’s instructions carefully.
Pocket Wi‑Fi (Shareable Internet)
Best for:
Families and groups who want one connection for multiple devices.
Not ideal for:
Solo travelers who don’t want an extra device to charge and carry.
My honest take:
It’s simple once it’s in your hand. The only downside is managing pickup/return and battery life.
Airport Limousine Bus (Low-Stress With Luggage)
Best for:
Travelers with large luggage, or anyone arriving tired who wants fewer steps and fewer transfers.
Not ideal for:
People on a tight schedule, since traffic and fixed timetables can be a factor.
My honest take:
If you value calm over speed, buses are often a very comfortable choice—especially on day one.
Luggage Delivery (Ship Bags to Your Hotel)
Best for:
Travelers with big suitcases who want to take trains without wrestling luggage.
Not ideal for:
Anyone who needs their suitcase immediately (delivery timing varies by service and location).
My honest take:
This can be a game-changer for stress levels. Just confirm delivery timing and where your hotel accepts luggage before you commit.
Stress-Free Checklist
- Save your hotel name, address, and phone number in your phone notes.
- Prepare a way to access the internet after landing (eSIM/SIM/pocket Wi‑Fi or airport Wi‑Fi).
- Complete Visit Japan Web in advance if possible, and keep your QR code accessible.
- Pack a pen, charger, and power bank in your carry-on.
- Keep your passport and any important documents in one easy-to-reach place.
- Keep baggage tag stickers until you reach your hotel.
- Choose a simple airport-to-hotel route with fewer transfers for arrival day.
- If traveling with big luggage, consider bus, taxi, or luggage delivery.
FAQ
Do I have to use Visit Japan Web?
In many cases it’s not strictly required, but it can make arrival smoother. Rules and procedures can change, so check the latest official guidance before your trip.
What if I forgot to do Visit Japan Web before landing?
You can often complete it after landing, but you’ll need internet access and it may slow you down. If possible, set it up before you fly.
Is English signage available in Japanese airports?
Generally yes, especially in major international airports. Look for “Arrivals,” “Immigration,” “Baggage Claim,” and “Customs.”
Should I exchange money at the airport?
It can be convenient for a small amount. Rates and fees vary, so many travelers compare options and just get enough cash for the first day.
What’s the easiest way to get to my hotel from the airport?
If you’re tired or have big luggage, an airport bus or taxi can feel easiest. If you’re comfortable with stations and transfers, trains are often fast and reliable.
Final Thoughts
Your first hour in Japan can feel intense, but it’s mostly because everything is new. The actual steps are simple once you know the order.
You don’t need to be perfect. You just need to be prepared.
Get through immigration and customs, set up your internet, choose the simplest route to your hotel, and call arrival day a win. Tomorrow is for exploring!